Creating KPIs
This guide covers how to create the different types of KPIs available. Users will require the [KPI] Manage KPIs permission to be able to create and manage KPIs.
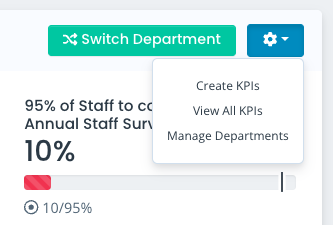
You can create a new KPI either via the KPI dashboard, or when viewing your KPI list, which you can find by clicking the configuration option on your main KPI dashboard and selecting View All KPIs
When creating a KPI, you will enter the name and select the relevant department before selecting what type of KPI you are building.
Qualitative KPI
Qualitative KPIs can be used to create targets with status tags and RAG ratings, without the need to add figures and percentage progress, useful for KPIs such as writing strategies or conducting tenders.
Select this type when creating a KPI and enter the following information:
- Current Progress - enter a status tag to edit the progress of your target, such as Not Started, In Progress, Complete. You can change this at any time to reflect the correct status of your KPI
- Current RAG Rating - select the RAG rating you would like to apply. You can change this at any time to reflect the correct rating of your KPI. This can be left if needed (the KPI will be grey until a RAG rating is selected)
- Preference Order - enter a figure to reflect the order you would like your KPIs to show on the KPI widget and main KPI dashboard. You can leave this blank if you have no preference. KPIs with no preference order given will appear in order of creation

Quantitative (Numerical) KPI
Quantitative (Numerical) KPIs allow you to create targets with numerical figures, useful for targets around membership numbers and sales. These KPIs can also be linked to reports for easy updates.
- Target - enter the target figure (you must enter a figure greater than 0)
- Current Method - you have the option to either manually update your KPI, or automatically adjust its progress by linking it to a report:
- Manual - then enter the Current progress of your KPI. You can change this at any time to reflect the progress of your KPI
- Automatic - select from the Current Report ID dropdown the report you wish to link to your KPI. When refreshing your Numerical KPIs, they will then update with the number of entries in the report. You can change the linked report at any time if needed. You can also modify the report itself if you need
- RAG Ratings - you have 2 options for applying RAG ratings to Quantitative (Numerical) KPIs:
- Enable automatic RAG rating - tick this option if you want to automatically apply your default RAG rating settings to the KPI. Further guidance on how to configure your auto RAG ratings can be found here: LINK
- Current RAG Rating - select the RAG rating you would like to apply. You can change this at any time to reflect the correct rating of your KPI. This can be left if needed (the KPI will be grey until a RAG rating is selected)
- Preference Order - enter a figure to reflect the order you would like your KPIs to show on the KPI widget and main KPI dashboard. You can leave this blank if you have no preference. KPIs with no preference order given will appear in order of creation

Quantitative (%) KPI
Quantitative (%) KPIs allow you to create targets based on percentage figures, useful for targets around student and staff satisfaction and engagement.
- Target - enter the target % (you must enter a figure greater than 0)
- Current - enter the Current % progress of your KPI. You can change this at any time to reflect the progress of your KPI
- Current RAG Rating - select the RAG rating you would like to apply. You can change this at any time to reflect the correct rating of your KPI. This can be left if needed (the KPI will be grey until a RAG rating is selected)
- Preference Order - enter a figure to reflect the order you would like your KPIs to show on the KPI widget and main KPI dashboard. You can leave this blank if you have no preference. KPIs with no preference order given will appear in order of creation

Updated on 3rd February 2026