FAQ
How do I give a staff member permission to scan someone into an event?
You will need to assign scanner permissions to the relevant members of staff to enable them to scan people into events:
- On the SUMS Platform, go to ‘Admin’;
- Select ‘Scanner Permissions’;
- Click ‘Create Scanner Permission’ to add a member to the permissions;
- Start typing the member’s name and select them from the list (all members’ names will be available for selection, so you can assign permissions to career and student staff);
- Select the relevant ‘Permission Type’ from the dropdown menu – you can either assign scanner permissions for ‘Group Events’ (assign to Committee Members), or all other ‘Events’ created by staff via the SUMS dashboard;
- Click ‘Submit’ to assign the permissions;
- You can ‘Modify’ or ‘Remove’ these permissions at any time.
You will see that you also have additional scanner permissions that you can select:
- Product Collection - the SU App can also be used to facilitate product collection. This permission grants the user access to this scanner
- Premium Upgrades - Premium Upgrades can be added to ticket products, such as a free drink token or access to a VIP area of your event. This permission grants the user access to this scanner to scan event tickets for the ticket holder to redeem any upgrades they may have
- Extended Session Length - this permission relates to scanning via an alternative device, such as a tablet/iPad. Take a look at our guidance on Scanning from an Alternative Device for further information.
Please Note: If you wish for a member of staff to have permissions for both Event types, you will need to two scanner permission entries for that member for each type.
How do I give student Committee Members permissions to scan students into their own event?
You don’t need to do anything – any Committee Member from the relevant Student Group will be able to scan members into their Group Events.
Take a look at the below training video on how you can assign Scanner Permissions and scan people into events via the SU App:
How can I add a thumbnail to an Event on the app?
You can do this in the same way that you add Event thumbnails to show on your website:
- Within the ‘Events’ module, select the ‘Events’ section;
- Select the relevant Event from the calendar and click ‘View’ (or convert to ‘List View’ at the top of the page to find the ‘Event’ and click the blue ‘View’ button alongside it);
- Click the green ‘Modify’ button on the right hand side of the page;
- Where it says ‘App Thumbnail’, click ‘Choose File’ and select the image you wish to upload;
- Once uploaded, ensure you scroll down to the bottom of the page and click ‘Submit’ to save your changes.
Note: It is not a requirement to add a thumbnail for your Event on the app, however any Events that do not have a set thumbnail will default to your SU logo.
How do I add further information to be seen on the Events PDF email?
- Find the ticket ‘Product’ within the relevant ‘Zone’ in the ‘EPOS’ module;
- Select ‘Modify’ for the product and scroll down to the ‘Shop Options’ section;
- Enter any additional information that you need in the ‘Ticket Information’ box;
- Ensure you scroll down to the bottom of the page and click ‘Submit’ to save your changes. This information will then be shown on the PDF that your members will receive upon purchase of the ticket. This can be changed at any time.
How do I modify text descriptions shown for SU+ on the SU App?
To adjust the Title and Subtitle shown on the SU+ page of your SU App:
- Go to ‘Settings’ under ‘System Configuration’;
- Scroll down to the section entitled ‘Students’ Union App’;
- Enter your ‘Title’ and ‘Subtitle’ and click ‘Save’ to update the text on the app.
To modify the descriptions and information given for SU+ Rewards advertised on the SU App:
- Create all of your SU+ Rewards and Benefits under the ‘Rewards’ module on SUMS, and you will be able to add descriptions for:
- Rewards Cards when you ‘Create/Modify Reward’;
- Benefits when you ‘Create/Modify Benefit’;
These descriptions can be changed at any time and will automatically update on the SU App.
How can I enable members to add their QR codes to their Apple Wallet?
- Find the ticket ‘Product’ within the relevant ‘Zone’ via the ‘EPOS’ module;
- Click ‘Modify’;
- Scroll down to the ‘Additional Information’ section;
- Ensure the ‘Add to Wallet’ check box is ticked.
This will ensure members are able to add their QR codes for Events tickets that they have purchased to their Apple Wallet.
Note: This feature is currently available only on iOS.
How do I make an Event appear on the app?
All Events created by via the SUMS Platform will appear on the app.
Where can Students find their tickets once they have been purchased via the app?
Students can view their purchased tickets by selecting ‘My Union’ at the bottom of the app and clicking ‘Tickets’.
Take a look at the below training video on how members can purchase and view their event tickets within the SU App:
How do I scan someone into an Event?
- On the app, go to ‘My Union’;
- Select ‘Administration’ and click ‘Scan Tickets’;
- A notice will appear advising that you will be taken to a new link in your browser – click ‘Yes’;
- On the SUMS web page you are taken to, select whether you wish to scan for a ‘Group Event’ or an SU ‘Event’ (your SU will have ensured you have permissions for the appropriate categories for your role);
- Select the relevant Event;
- A notice will appear requesting access to your camera to enable you to scan the QR codes – click ‘Allow’;
- You will now be able to scan the QR codes for your Event, and attendance will automatically be registered as these are scanned.
The scanner will beep every time a code is scanned.
When scanning event tickets, the name of the ticket product that was purchased will be confirmed. This will be the title of the product as it currently stands.
If you have to renamed a ticket product after people have already purchased it, the title that appears upon scanning will be the current product name, not the name at the point that it was purchased.
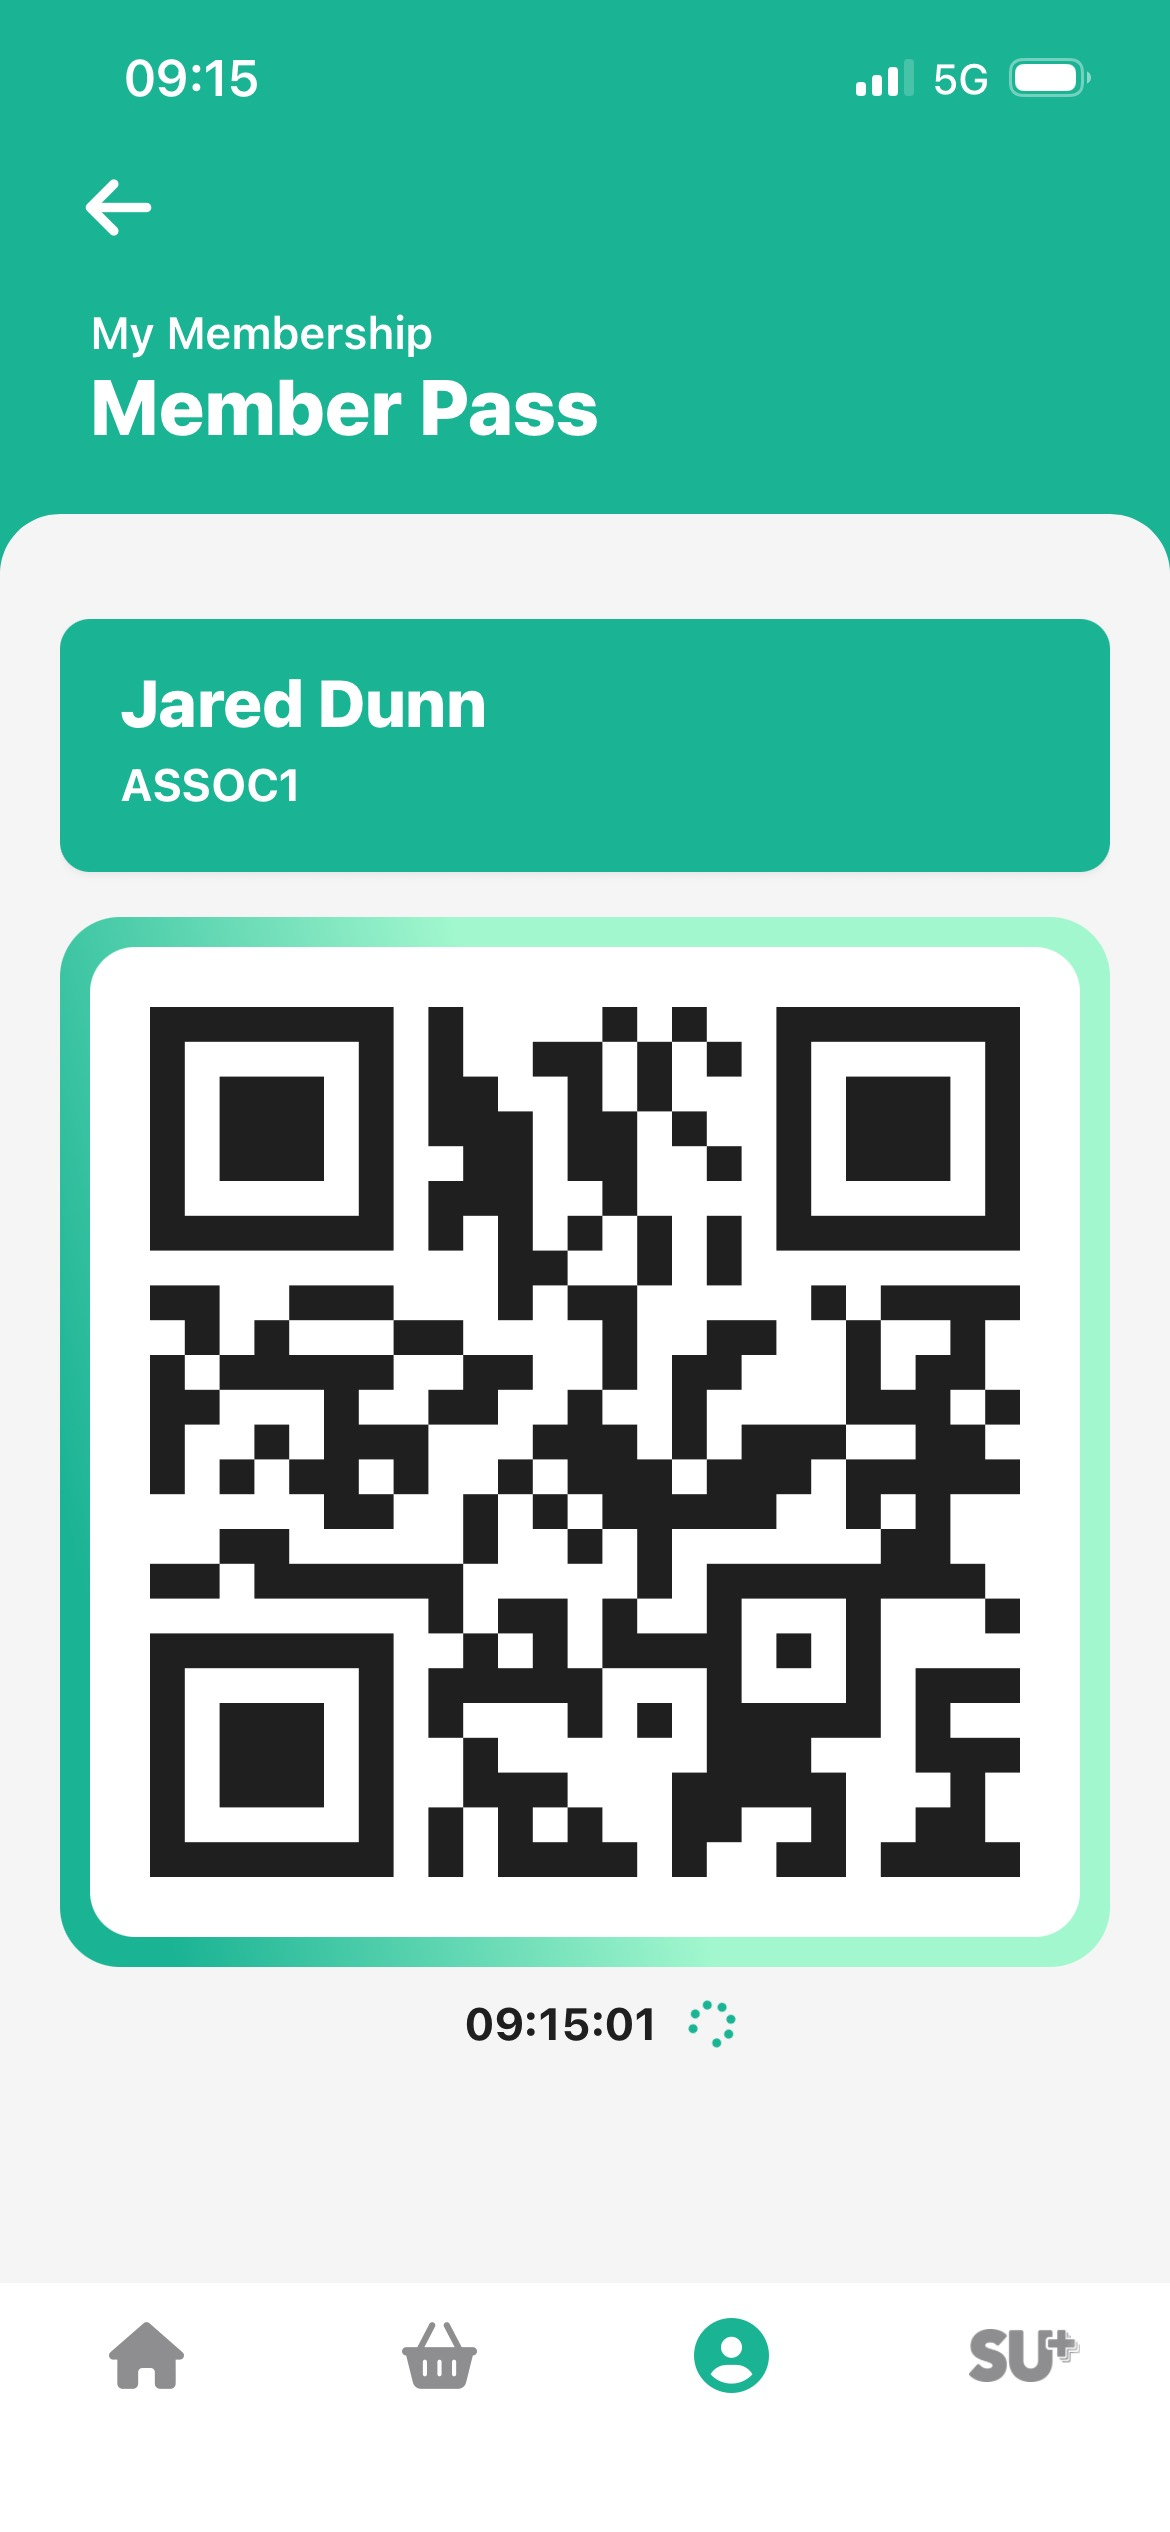
How can I tell if I am scanning a screenshot of a QR code?
All event tickets and Member Passes within the SU App have animated features to allow you to determine if the QR code you are scanning is live within the app. All QR codes will have:
- a live graphic border
- the current time shown below the QR code, with a live loading icon
The QR code will still be scannable if you are scanning an image, but you will be able to tell that it is a screenshot if none of the above features are live.
How can I manually register/scan a ticket against an Event?
- On the app, go to ‘My Union’;
- Select ‘Administration’ and click ‘Scan Tickets’;
- A notice will appear advising that you will be taken to a new link in your browser – click ‘Yes’;
- On the SUMS web page you are taken to, select whether you wish to scan for a ‘Group Event’ or an SU ‘Event’ (your SU will have ensured you have permissions for the appropriate categories for your role);
- Select the relevant Event;
- When the notice appears requesting access to your camera, click ‘Cancel’;
- Select the ‘Search Tickets’ button at the bottom of the page;
- A full list of all tickets for that event will show;
- You will be able to search for a specific ticket using the customer’s name, Student ID or Ticket ID number;
- Search for the relevant ticket and click the ‘Admit’ button to register the ticket against the Event.
How can I see who's QR codes have been scanned?
- Go to the 'Events' section within the Events module;
- Find the relevant Event and click 'View';
- Under the 'Dates' section of the Event, click the blue *'QR COdes' button to view all the QR codes that have been scanned so far for that event.
How can I resend a confirmation email to member with an event ticket/QR code?
Firstly, you will need to find the relevant transaction, depending on whether it was a member sale or a public sale. If it was a member sale, you can do this by entering their profile via the ‘Members’ module, scrolling down to ‘Transactions’ and clicking ‘View’ alongside the relevant entry. This will take you to the transaction page.
For a public sale, you will need to find the transaction number in order to navigate to the transaction page. For guidance on how to do this, please see our FAQ on finding transaction numbers: https://sums.lincolnsu.com/support/faq?category=12
Once you have navigated to the relevant transaction page, scroll down to the bottom of the page and select the yellow ‘Email’ button to resend the purchase confirmation, including the QR code for their ticket.
Updated on 9th March 2026